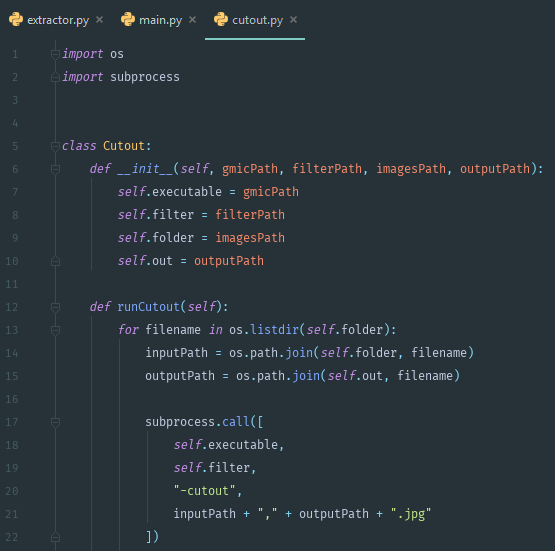
In the development of my game there came a point where I realized I will need a conversation system with face avatars.
Therefore I’ve decided to create a face generator based on a famous game Papers, Please.
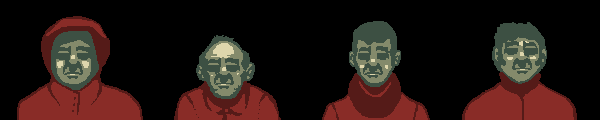 Dukope’s Face Generator (from Papers, please)
Data gathering
I’ve downloaded about 50 portraits from pixabay.com (all the images are CC licensed with no attribution required).
Next I cut the background of each image in Photoshop (just a polygon select tool and the Delete key). I plan to use the cutout effect later to hide any imperfections.
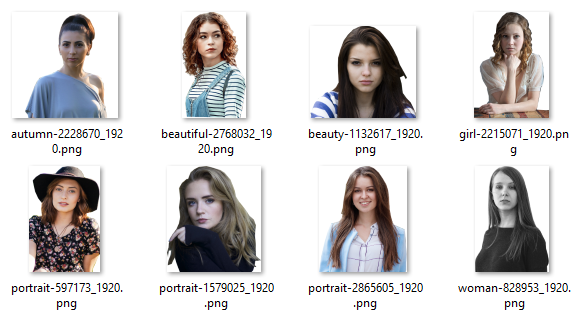 Images with removed background
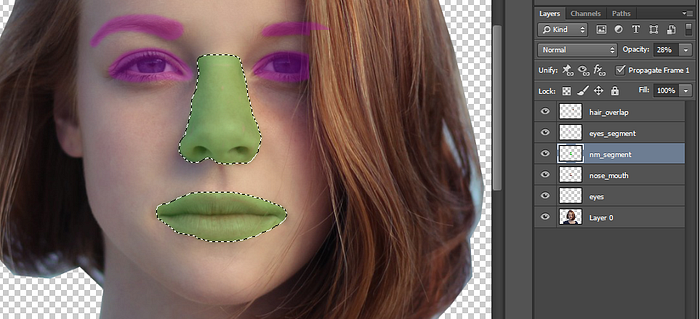
Face segmentation
I am using layers for face segmentation. I simply brush paint the “nose and mouth” and then the “eyes and eyebrows” parts and then create a new PS layer for it. I do that by selecting the visible pixels (Ctrl+layer thumbnail click) and making a new layer from the selected. Any hair, glasses or other face cover goes into a layer named “hair_overlap”. I mark the segments for all of the 50 images.
 Layer workflow
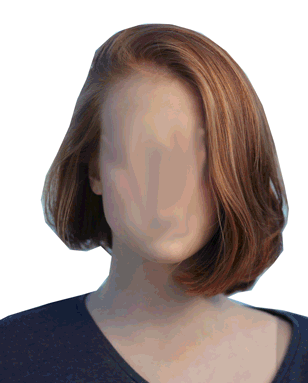
I also must prepare the faces for the newly pasted features — I use the Clone Stamp Tool, clone the skin and smudge all the facial features (new layer smudged).
Layer workflow
I also must prepare the faces for the newly pasted features — I use the Clone Stamp Tool, clone the skin and smudge all the facial features (new layer smudged).
Feature extraction
Some portrait photos I’ve downloaded are not suitable for using it as a whole, so I extract just the features I can use for the generator (i.e. only nose and lips).
I am going to extract the features with psd_tools and Pillow Python libraries (install those with pip install psd-tools Pillow or let your IDE take care of it).
 This code snippet should list all the layers and their bounding boxes..
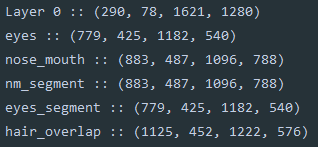 ..and it does.
Next I want to export all the layers into individual image files. I also create a folder for each layer name (the code snippet below produces mutliple folders and files, i.e. eyes/girl-919048_1920.psd.png).
..and it does.
Next I want to export all the layers into individual image files. I also create a folder for each layer name (the code snippet below produces mutliple folders and files, i.e. eyes/girl-919048_1920.psd.png).
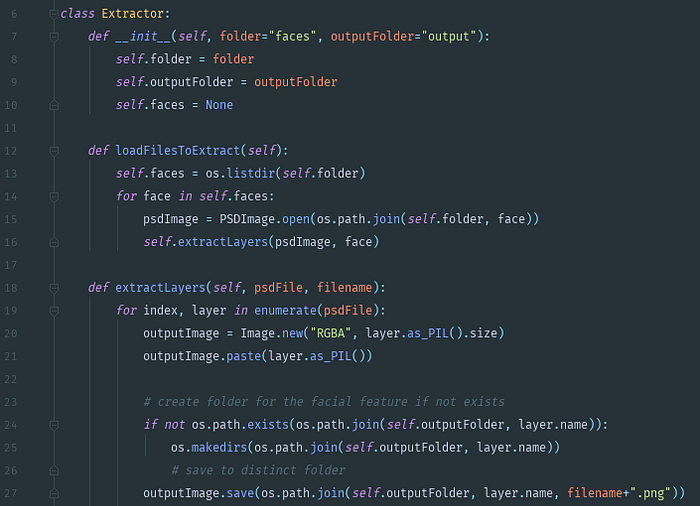 Extracting layers to image files
 Extracted “eyes” layers
 “nose_mouth” layers
Faces generator
Now I just have to put it all together, the Pillow Image is going to help with that.
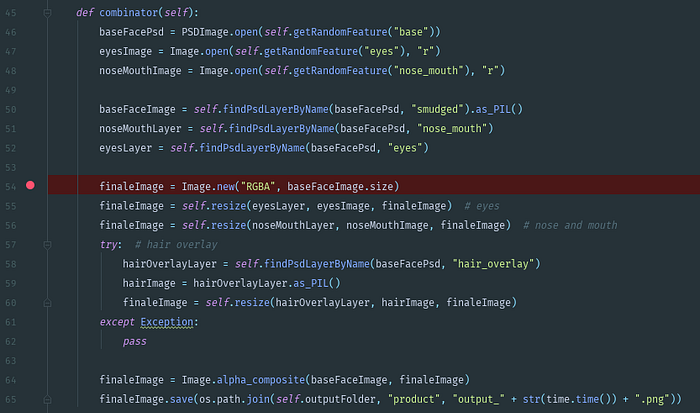 Layer upon layer
The generated images are kind of ugly, so now is the time to try to hide the imperfections with the cutout filter.
Layer upon layer
The generated images are kind of ugly, so now is the time to try to hide the imperfections with the cutout filter.
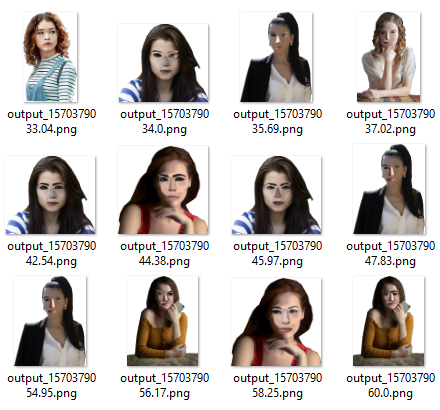 Generated images
The cutout filter works quite well to “hide” the faults.
Generated images
The cutout filter works quite well to “hide” the faults.
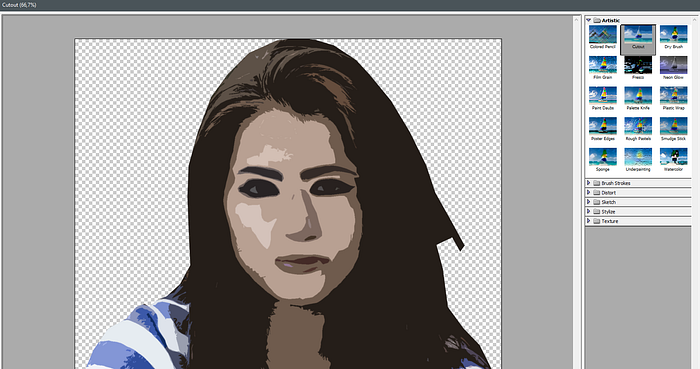 Cutout effect in action
Unfortunately there is no way to create this effect in Python without using Sobel filters, median filters and dithering, which would be very time consuming to implement. I’ve found a GIMP plugin FU_artist_cutout.scmwhich does the same thing, but that won’t be the right way to approach it either. I am going to use G’MIC library, which has also an online UI.
Cutout effect in action
Unfortunately there is no way to create this effect in Python without using Sobel filters, median filters and dithering, which would be very time consuming to implement. I’ve found a GIMP plugin FU_artist_cutout.scmwhich does the same thing, but that won’t be the right way to approach it either. I am going to use G’MIC library, which has also an online UI.
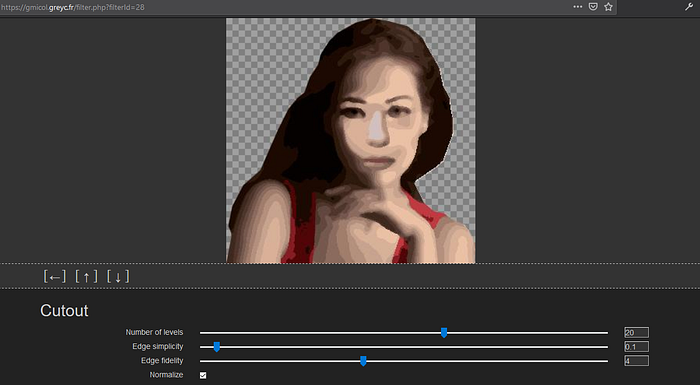 G’MIC online utility
As it turns out, gmic can only use scripts, it doesn’t have a command line parameter for the cutout effect. I’ve found the definition of the cutout effect in the file gmic_stdlib.gmic:
G’MIC online utility
As it turns out, gmic can only use scripts, it doesn’t have a command line parameter for the cutout effect. I’ve found the definition of the cutout effect in the file gmic_stdlib.gmic:
fx_cutout :
-repeat $! -l[$>] -split_opacity -l[0]
-median {10-$3}
-quantize $1
--area. 0,1 med=${-med} -rm.
-inpaint_holes {$med*$2%},0,1
-if $4 -n 0,255 -endif-endl -a c -endl -done
Now I can create my own cutout filter for g’mic:
# File `myCutout.gmic`
cutout :
  -echo "Arguments : $1,$2"
  -input $1
    -repeat $! -l[$>] -split_opacity -l[0]
    -median 6
    -quantize 20
    --area. 0,1 med=${-med} -rm.
    -inpaint_holes {$med*0%},0,1
  -endl -a c -endl -done -output $2
With this and the command line tool I am ready.
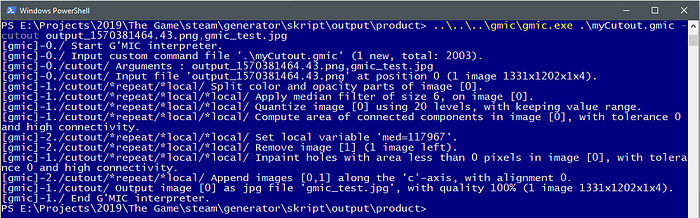 G’MIC in action
 Random Face. Hair overlay working, swell.
Now I just plug it in to subprocess and let it run for some time to generate as many random faces as I want. Done.
Random Face. Hair overlay working, swell.
Now I just plug it in to subprocess and let it run for some time to generate as many random faces as I want. Done.
 The code and a few .psd test files are available on my github.