
I did not solve the problem of using multiple disks in my home NAS very well with LVM in the last article, so I am going to upgrade the solution now with ZFS.
What is ZFS?
ZFS is an advanced file system, with awesome features like pooled storage, snapshots, automatic repair and data integrity verification, RAID-Z and 16 Exabyte file size limit.
Pooled storage
ZFS combined the features of a volume manager (like the LVM I used last time) and a file system. That means the filesystem can span across multiple drives or a pool.
Previous solution with LVM
I had the following setup in the previous solution, using Logical Volume Manager:
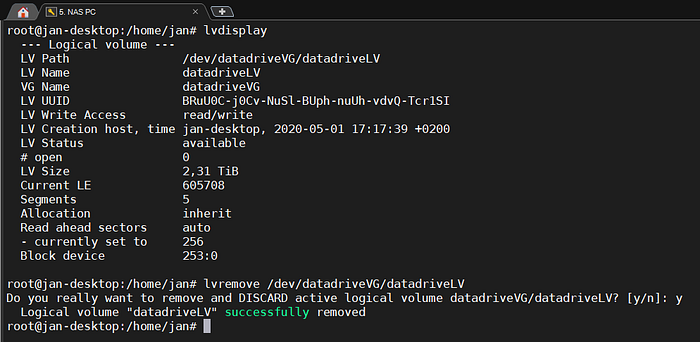
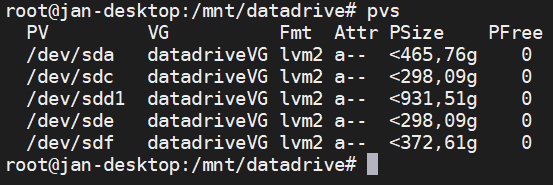 Just a bunch of HDDs in one big (2.3 TB) logical volume. That brings a big problem — if one of the drives fails, the whole logical volume gets corrupted.
This is where ZFS comes in.
Just a bunch of HDDs in one big (2.3 TB) logical volume. That brings a big problem — if one of the drives fails, the whole logical volume gets corrupted.
This is where ZFS comes in.
Replacing LVM with ZFS
First I had to backup my data to another (external) drive. Then I unmounted the logical volume and deleted it.
 In the first solution I didn’t check the health of the disks, so I’ve done it now. I’ve used SMART (Self-Monitoring, Analysis and Reporting Technology).
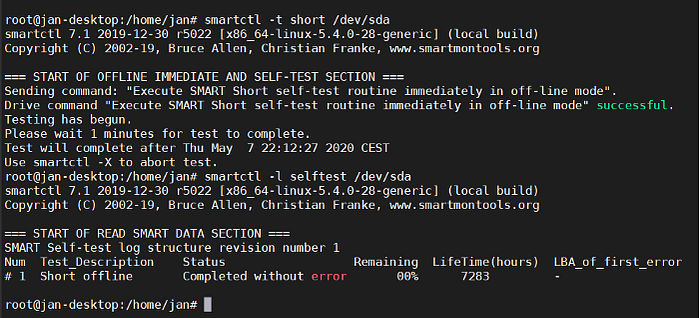 I found that 3 of the disks were full of errors and faults, so I chose only the sdd (WD 1TB) and sde (WD 320GB) drives, which also have the fastest read speeds (I didn’t test write speed, read speeds were enough for me as a benchmark). I’ve tested the read speeds with hdparm.
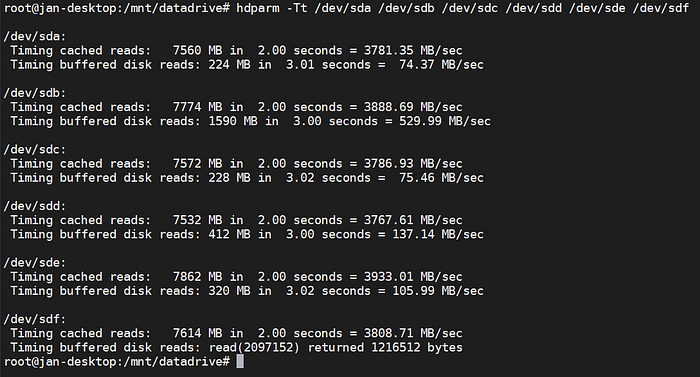 (sdb is the system SSD and sdd is SATA3 HDD)
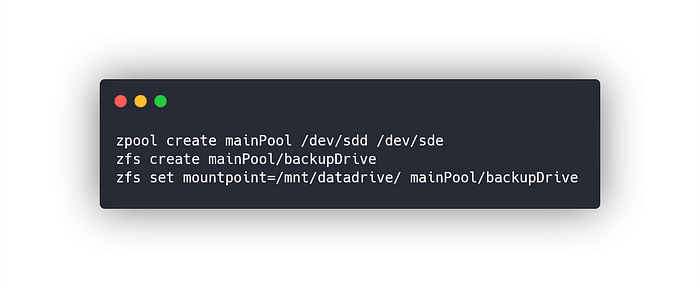
Installing and using ZFS
First I formatted the disks to a Solaris filesystem (“be” code in fdisk, tutorial in the previous article).
Then I used the zfstools (apt install zfsutils-linux) to create the pool, mount it to a mount-point and start using ZFS.
 Pool list
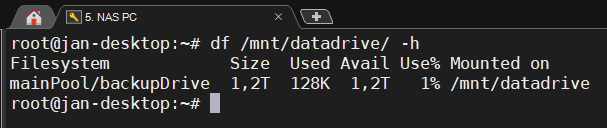 Mount point — free space
The mount-point was already registered in samba configuration from the last article, so I could start using the network drive right away.
Mount point — free space
The mount-point was already registered in samba configuration from the last article, so I could start using the network drive right away.
Done.