If you want to become a game developer, but were always afraid of learning a programming language, Bolt visual scripting language might be the right starting point for your gamedev journey!
Two main game engines in the industry, Unreal Engine 4 and Unity now both have the option to use a visual scripting language, instead of the classic programming languages. In the case of UE4 it’s has always been the blueprint system (used primarily instead of C++) and in the case of Unity it’s Bolt.
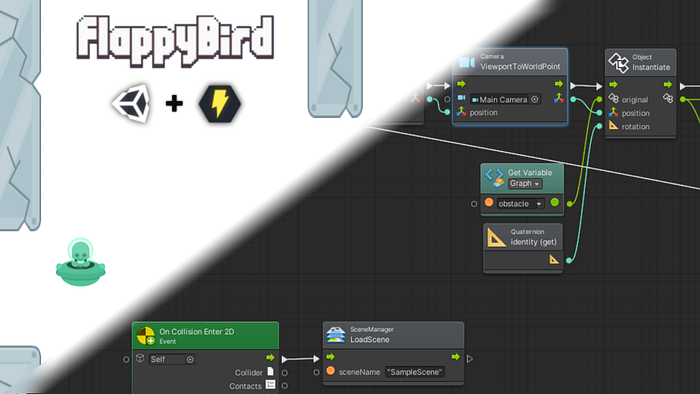
In this tutorial we will make a clone of the popular game Flappy Bird and we will replicate the original controls and obstacle generator. The obstacles will be infinitely generated off-screen and move to the left (common trick to create the illusion of movement of the main character that the infinite-scroller games use). Let’s do it!
 The final game + the player controller Bolt graph
Installing Bolt
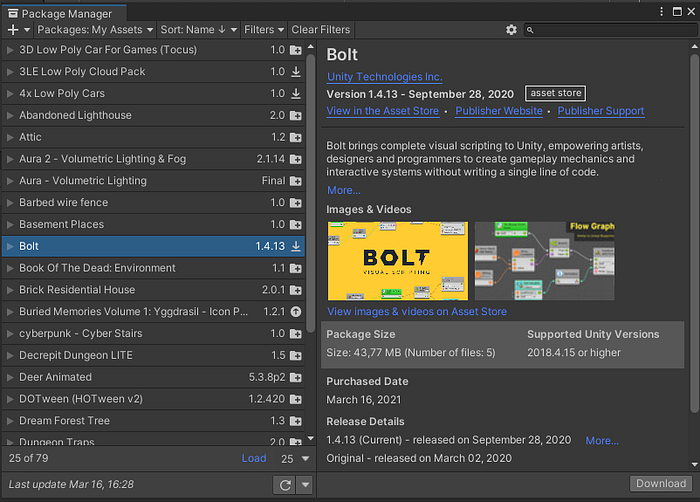
First we create a new 2D project in Unity 2020 and we install Bolt (link). If you are not sure how to create a new project or install a new package, check the first part of my game development series.
Select 2D as the type of the new project. After importing Bolt from the Asset Store, download it in Unity via the Package Manager → My Assets → Download.
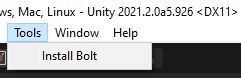
 And then install it via Tool → Install Bolt. Follow the setup wizard (Next → programmer naming → next → generate).
Player character
We will use an alien as the main player character. You can choose whatever sprite you like, I found the alien on Kenney’s game assets page.
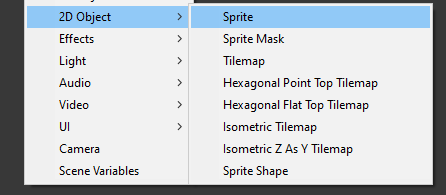
But first we need to create a new game object for it. Click in the hierarchy window and select 2D Object → Sprite.
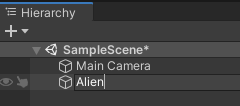
 Rename the new object to Alien.
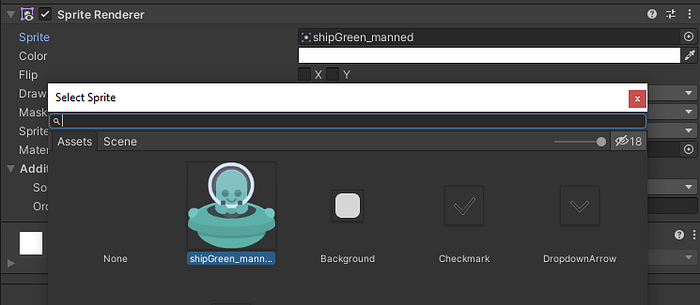
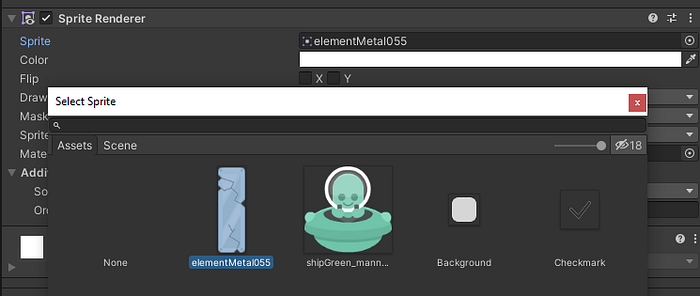
 In the Sprite Renderer component change the Sprite to shipGreen_manned (you can also download the asset from my github repo with the complete project solution. Links below).
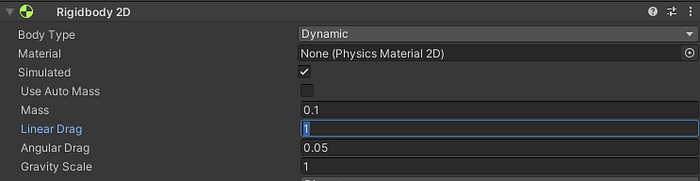
 Press the Add Component button and add a Polygon Collider 2D. This way we will make sure to use perfect collision detection with the obstacles. Next we add RigidBody2D for gravity simulation. Change the Mass and Drag parameters to 0.1 and 1 respectively, so the player movement matches that of the original Flappy Bird.
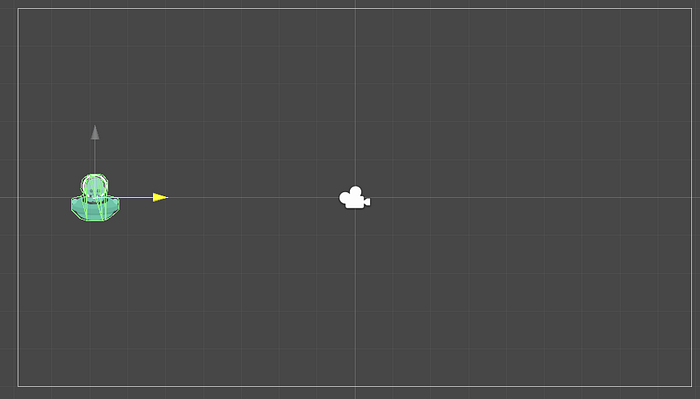
 In the scene view move (W shortcut) the object to the left of the screen viewport.
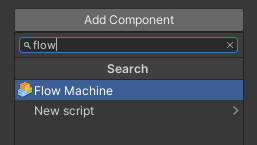
 Next we add the most important component, Flow Machine. It will control the logic for controlling the character.
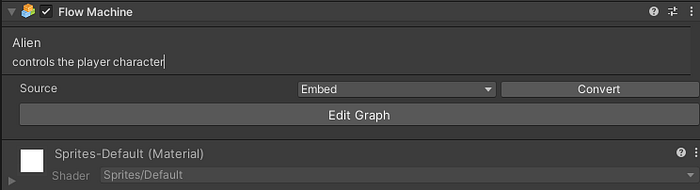
 Let’s change the Source to Embed. Rename it to Alien and add description.
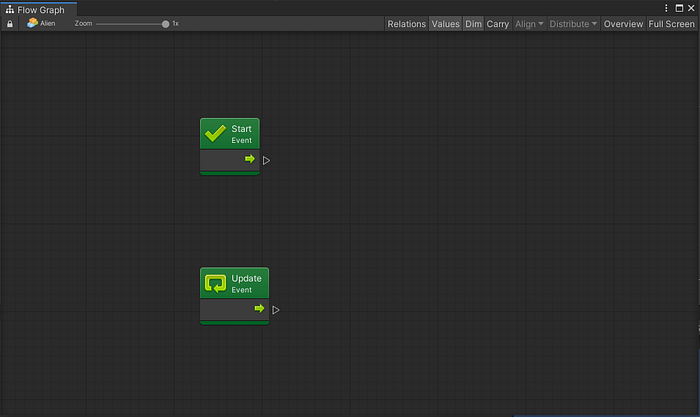
 After you click the Edit graph button a new interface appears. We will use this graph editor for the visual scripting.
The graph has Start and Update method, just as any new script implementing the MonoBehavior interface.
After you click the Edit graph button a new interface appears. We will use this graph editor for the visual scripting.
The graph has Start and Update method, just as any new script implementing the MonoBehavior interface.
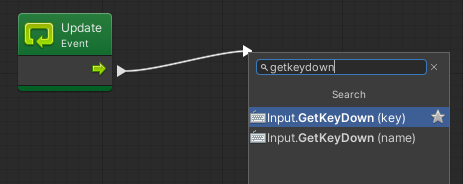
 You can add new function with the output arrow or clicking into the empty space. Dragging the node output arrow will load a dialogue for searching the existing methods. So let’s find a method for the keyboard input (Input.GetKeyDown), so we can control our character.
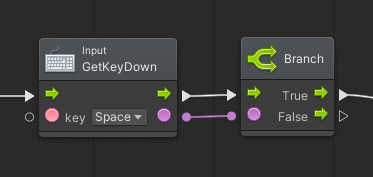
 Let’s use the Space key for flying. Pick Space as the key parameter.
 Continue with Control → Branch (if condition equivalent).
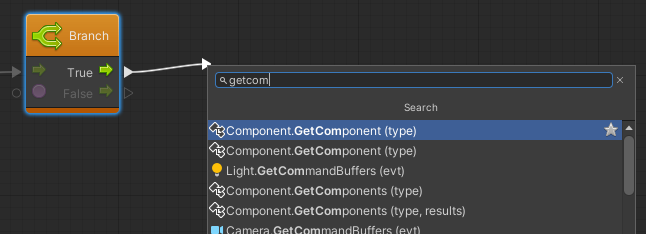
 Next we will need the reference for the RigidBody2D component of the player object.
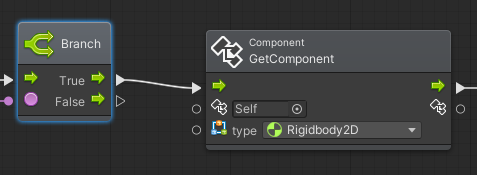
 Pick the RigidBody2D as the type.
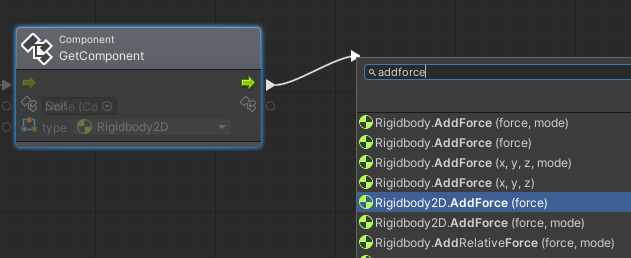
 Let’s add a kinetic impulse via the RigidBody2D.AddForce function. That will emulate the Flappy Bird movement — each press “kicks” the bird upwards.
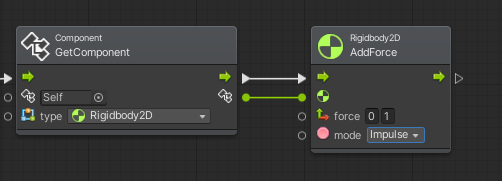
 We want the Alien to “jump” up, so let’s change the y coordinate to 1 and mode to Impulse.
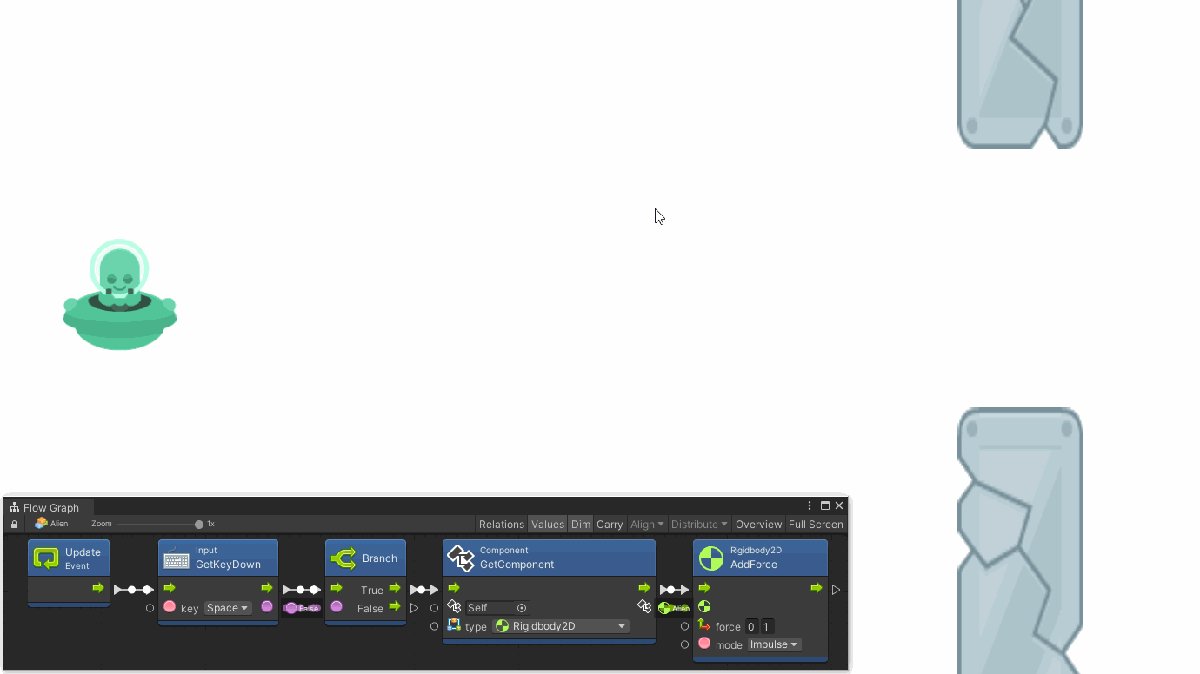
 Complete logic for the player character looks like this:
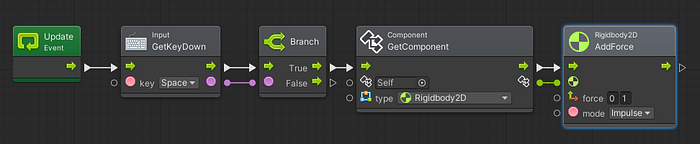 Now when we run the game, we can control the alien by using the spacebar.
 If you like this tutorial, check out my udemy course where I can teach you how to make an 3D action horror game in Unity! Below is a coupon code for a 50% OFF, it will be available for the next 30 days.
Hi, my name is Jan Jileček and I am a professional game developer with master’s degree in computer science and I’ve…
Obstacles
Same as with the Alien, we add a new Sprite via the 2D Object → Sprite menu and rename it to Obstacle. In the Sprite Renderer component we pick the elementMetal055 sprite (also from kenney.nl or my github).
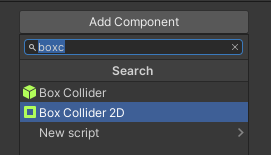
 And we add a Box Collider 2D.
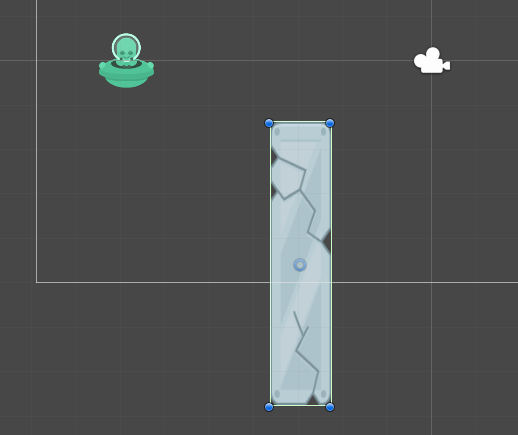
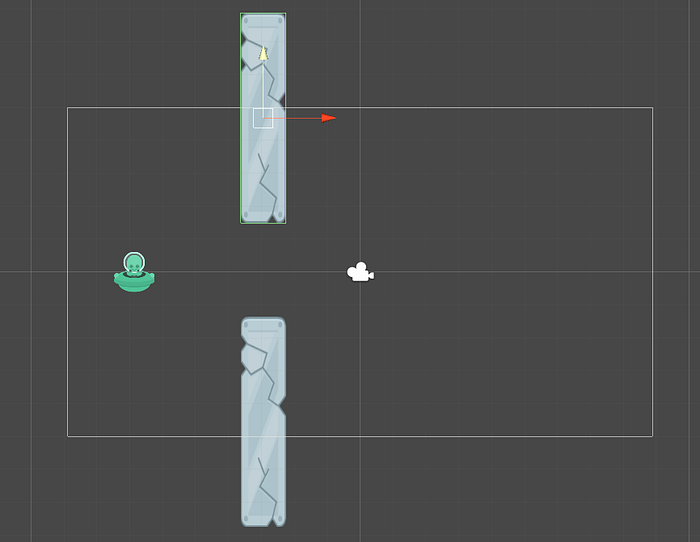
 Using the Rect tool we change the dimensions of the obstacle object to match the original obstacles of Flappy Bird. We move the obstacle slightly outside the viewport (we will manipulate the position of the generated instance of a new obstacle via the flow graph).
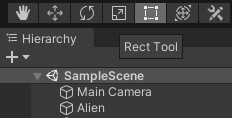 Rect tool
 Now we duplicate the object (click it in the hierarchy window → Duplicate) and move it to the upper side of the screen, so we create a gap between the two panels.
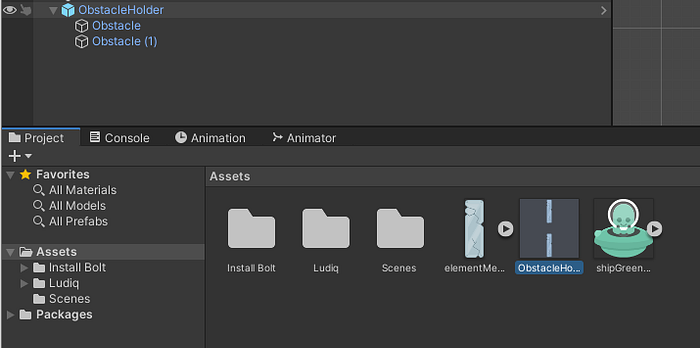
 Next we create a new “parent” object, rename it to ObstacleHolder and associate the previous 2 Obstacle objects with it by dragging them onto the ObstacleHolder.
 We also have to create a so called “prefab” of the ObstacleHolder object. All you need to do it drag the ObstacleHolder object from the hierarchy window into the Assets window.
 This way we will be able to create instances of the object from the generator script. Now, when we have the prefab ready, we can delete the original ObstacleHolder. From now on we will be using only the prefab.
Obstacle Generator
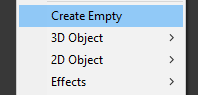
Let’s create an empty object (Create Empty) for the obstacle generator. Rename it to Generator. Next add a Flow Machine component the same way as with the Alien, and open the graph editor.
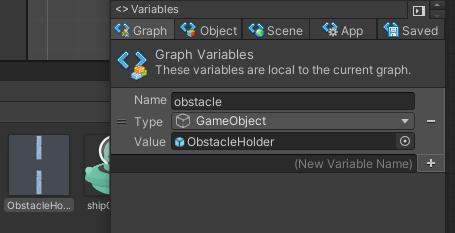
In the left sub-window of the editor we can see the variable manager. Here we create a new scene variable of type GameObject, which will hold a reference to the ObstacleHolder prefab. After naming the new variable just drag the prefab from the Assets into the value field.
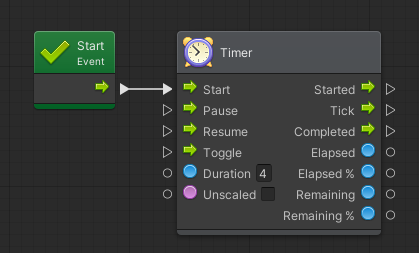
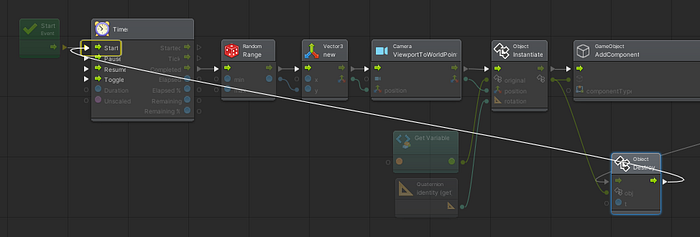
 Next we add a new graph node, Timer. It will be responsible for periodic obstacle generation. we need the Timer to start counting immediately after creating the generator, that is why we call it from the Start method. Let’s set the duration to 4 seconds.
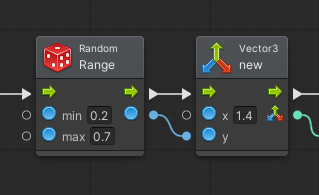
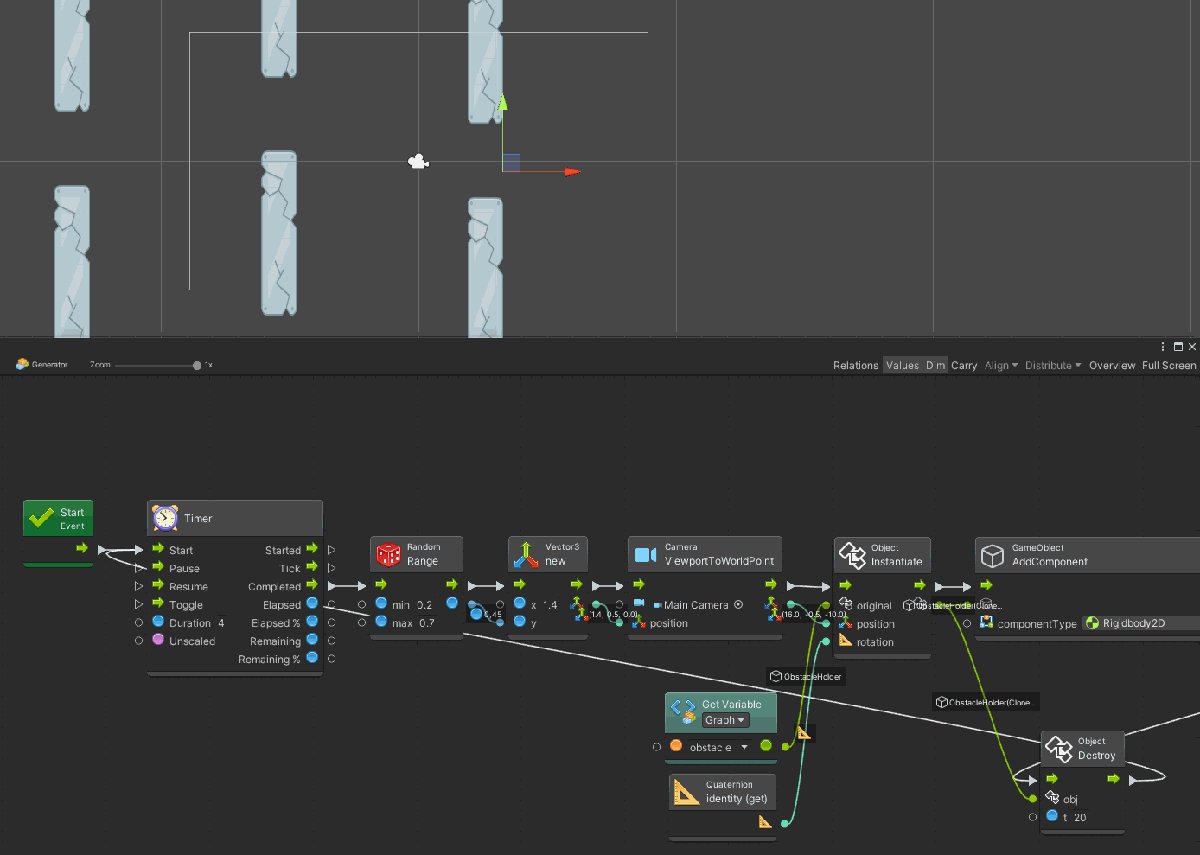
 Each obstacle instance will be generated with a random offset on the y axis. For that we use the Random.Range function, which we set to generate a random number from 0.2 to 0.7 (I’ve tested these values, they are the best fit to common screen resolutions).
We will then pass the value to a new Vector3 node, where we edit the x value to 1.4 (we need to spawn the obstacles outside the visible screen space, in this case it will tell the next method to spawn it 40% of the width to the right).
Each obstacle instance will be generated with a random offset on the y axis. For that we use the Random.Range function, which we set to generate a random number from 0.2 to 0.7 (I’ve tested these values, they are the best fit to common screen resolutions).
We will then pass the value to a new Vector3 node, where we edit the x value to 1.4 (we need to spawn the obstacles outside the visible screen space, in this case it will tell the next method to spawn it 40% of the width to the right).
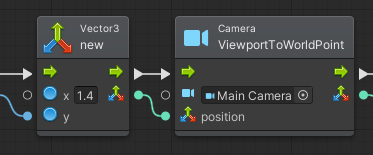
 Next we pass this Vector3 to the ViewportToWorldPoint function, which translates the provided values to screen coordinates. We also need to edit the camera parameter to Main Camera.
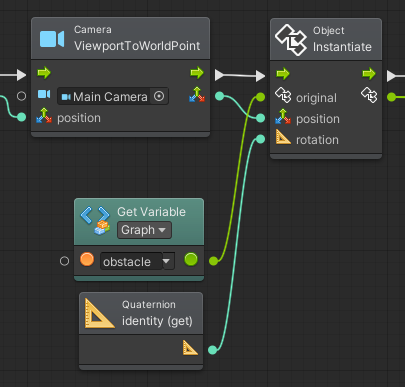
 Now we have the actual screen coordinate where we can generate a new obstacle. For that we will use the Instantiate function. We pass it the previously created reference to the ObstacleHolder (by using the Get Variable → Graph → obstacle), the calculated Vector3 position and a default rotation (get Quaternion identity).
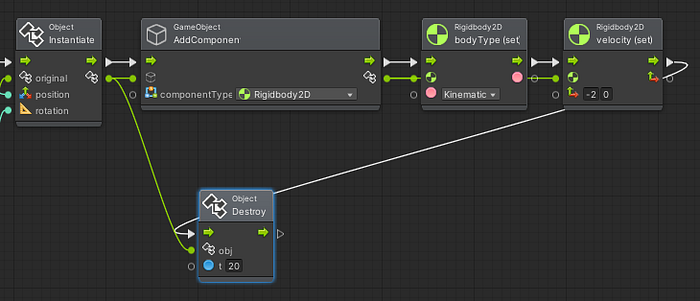
 Next we add a RigidBody2D component to the instantiated ObstacleHolder and set it to kinematic (set RigidBody2D.bodyType) and set the speed on x axis to -2 (set RigidBody2D.velocity). That will ensure a proper collision handling and movement to the left of the screen.
One more thing we need to do here is to connect all of this to the Destroy method, which will automatically delete the object after 20 seconds — when the object is already outside of the view and not needed. We need to pass to it an object instance that we created a few steps back.
Next we add a RigidBody2D component to the instantiated ObstacleHolder and set it to kinematic (set RigidBody2D.bodyType) and set the speed on x axis to -2 (set RigidBody2D.velocity). That will ensure a proper collision handling and movement to the left of the screen.
One more thing we need to do here is to connect all of this to the Destroy method, which will automatically delete the object after 20 seconds — when the object is already outside of the view and not needed. We need to pass to it an object instance that we created a few steps back.
 Last step is to connect the flow back to the Timer, so the whole sequence we just created repeats in a cycle (4 second timer = 4 second cycle).
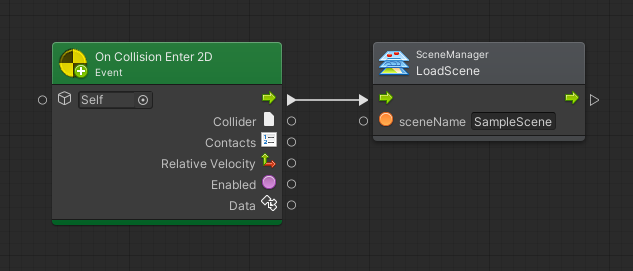
 Let’s also add a collision detection of the player with the obstacle. Once that happens, the whole scene reloads, effectively restarting the game. We don’t need to worry about the details of the object we are colliding with, because we can collide literally only with 2 objects in this game.
 The final game!
This whole game project is available on my github.
The final game!
This whole game project is available on my github.