In this tutorial we are gonna build a simple CRUD app (Create, Read, Update, Delete) for keeping a “TODO” list. We will use Python 3 and two external libraries. The first one is the Flask web framework and the second in SqlAlchemy, ORM mapper for easier database manipulation. We’ll use Bootstrap as the frontend. Python code will fit into 50 lines of code and the HTML too.
Install the dependencies and prepare the environment
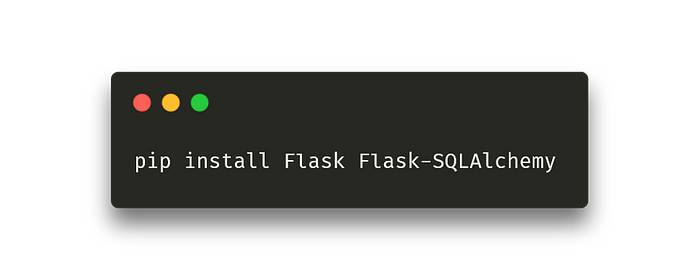
First, we will use the pip dependency manager to install flask and SQLAlchemy (pip is shipped with every Python installation).
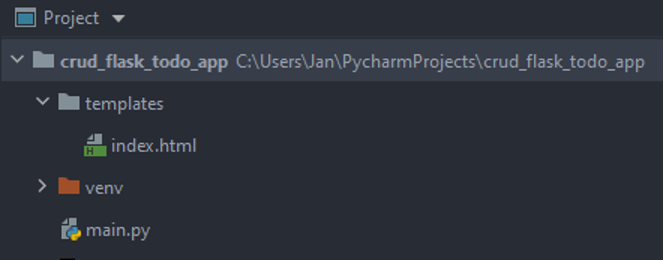
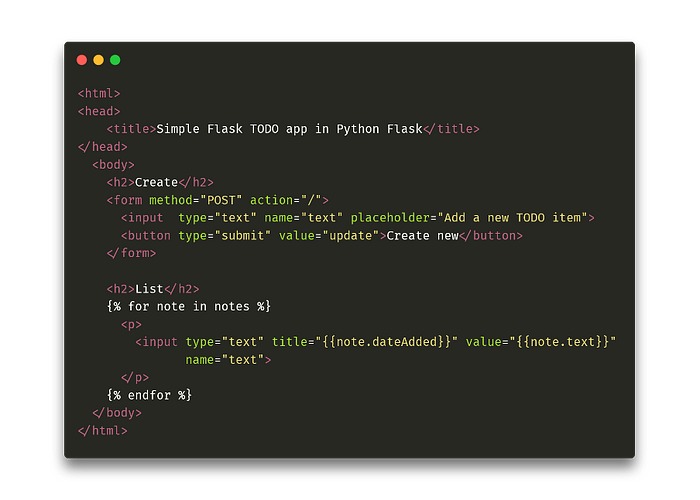
 Let’s create a template folder in the root folder. Flask uses it to load HTML templates. Create a new index.html file.
Imports and app initialization
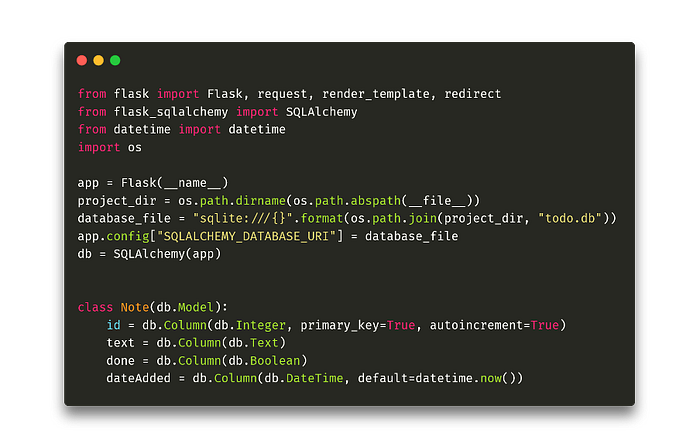 First, we need to import the required dependencies. Then we initialize the Flask app (we use the active module name, __name__, as the argument). Then we create the database connection. I am using a basic file database, SQLite. If you have a more complex database running as a separate process (MariaDB, Postgres), use that. You only need to change the connection string. We then pass this string as a URI db address and run SQLAlchemy. An important step is to define the database model.
For that we create the Note table, with automatic id, the text of the todo task, boolean holding the done value, and an automatic date dateAdded, holding the creation time. Later we will initialize the database with this model.
First, we need to import the required dependencies. Then we initialize the Flask app (we use the active module name, __name__, as the argument). Then we create the database connection. I am using a basic file database, SQLite. If you have a more complex database running as a separate process (MariaDB, Postgres), use that. You only need to change the connection string. We then pass this string as a URI db address and run SQLAlchemy. An important step is to define the database model.
For that we create the Note table, with automatic id, the text of the todo task, boolean holding the done value, and an automatic date dateAdded, holding the creation time. Later we will initialize the database with this model.
CRUD API
Let’s create 4 methods, that will ensure that our app will be a CRUD app — it will be able to create, read, update and delete records.
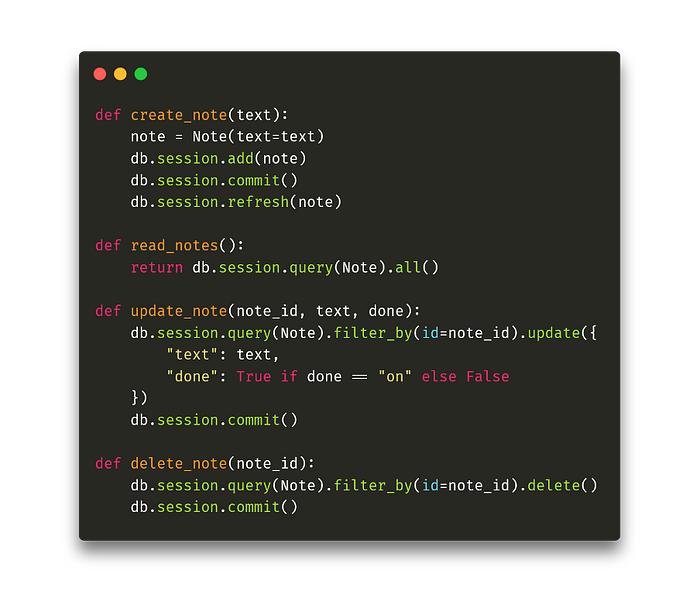 The create_note method has only the task text as a parameter. First, we create a new Note, pass this parameter as text and save it in the database. For read_notes, we only list all Note records from the database. The update_note method has 2 parameters, text and done. The text is again the text of the task and done is the value of the checkbox of the form that we will create. If the value of this checkbox is “on” (ie. it is checked), then the stored boolean value done will be True, otherwise False. Now only the method for deleting, delete_note, remains.
Home page, adding and displaying records
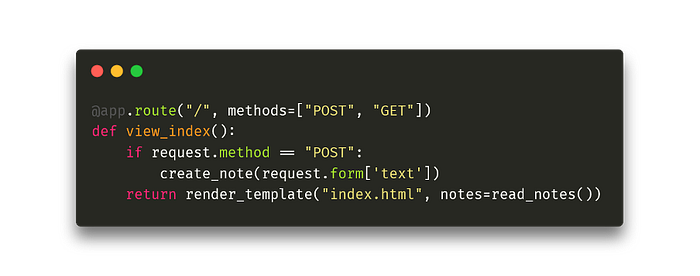 In the Flask framework, endpoints are defined using the @ app.route decorator. The first parameter is the relative URL. Another optional parameter holds the allowed request methods, in our case POST and GET for form processing. The POST method means that we are sending a form with a newly created task. But whether it is POST or GET, we will display the index.html template and pass to the Jinja template system all the tasks we have stored in the database (read_notes) to draw them into the template.
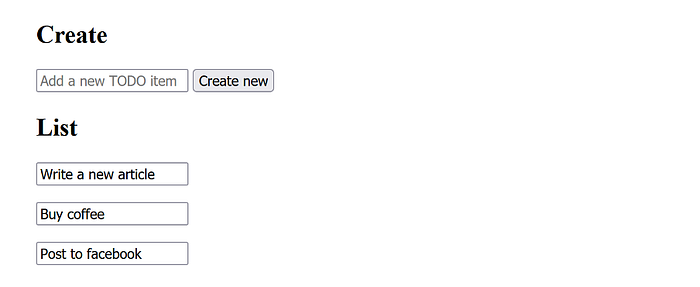
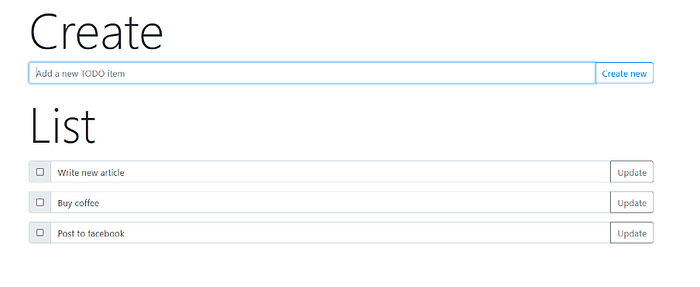
 The first form will be connected to the “/” endpoint, ie. to the home page. It will only have one input field for the text and a submit button. Then we will go through all the records we passed to the template in the notes variable and display them all. Later we will add a form to each record — so it will be possible to edit and delete individual records from the frontend. For now, the page looks like this. We can add and display, but not edit and delete.
Editing, deleting, and better frontend
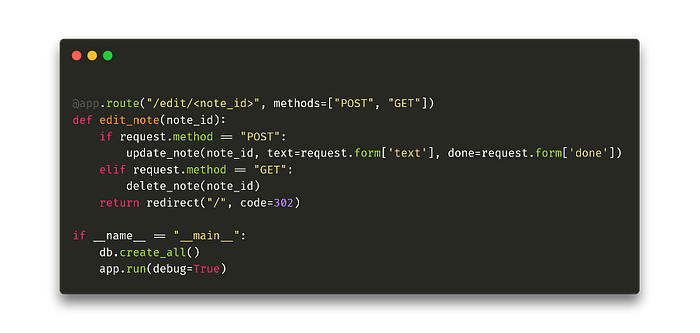 The method for editing and deleting is a bit more complicated. We specify the relative address of the endpoint as /edit/note_id, ie. that we will pass a parameter to the URL, which we named note_id. We pass it to the edit_note method. If the input request is made via POST, we pass the input form to the update_note function to modify the task. If as a GET request, then we delete the given task. When done, we will redirect everything to the original page.
In the Python code, we call db.create_all, which creates a database with all the tables we specified (in our case, only Note) and then runs the entire Flask application.
Finally, we adjust the template to make it look good. This requires a significant modification of the existing HTML code (for the whole application, visit my Github).
The method for editing and deleting is a bit more complicated. We specify the relative address of the endpoint as /edit/note_id, ie. that we will pass a parameter to the URL, which we named note_id. We pass it to the edit_note method. If the input request is made via POST, we pass the input form to the update_note function to modify the task. If as a GET request, then we delete the given task. When done, we will redirect everything to the original page.
In the Python code, we call db.create_all, which creates a database with all the tables we specified (in our case, only Note) and then runs the entire Flask application.
Finally, we adjust the template to make it look good. This requires a significant modification of the existing HTML code (for the whole application, visit my Github).
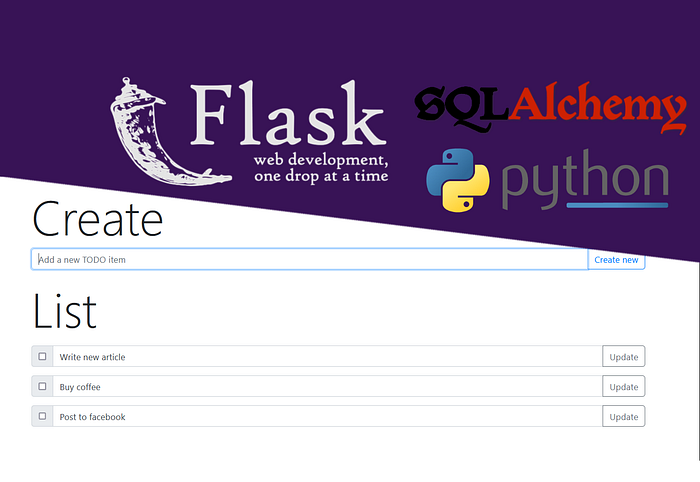
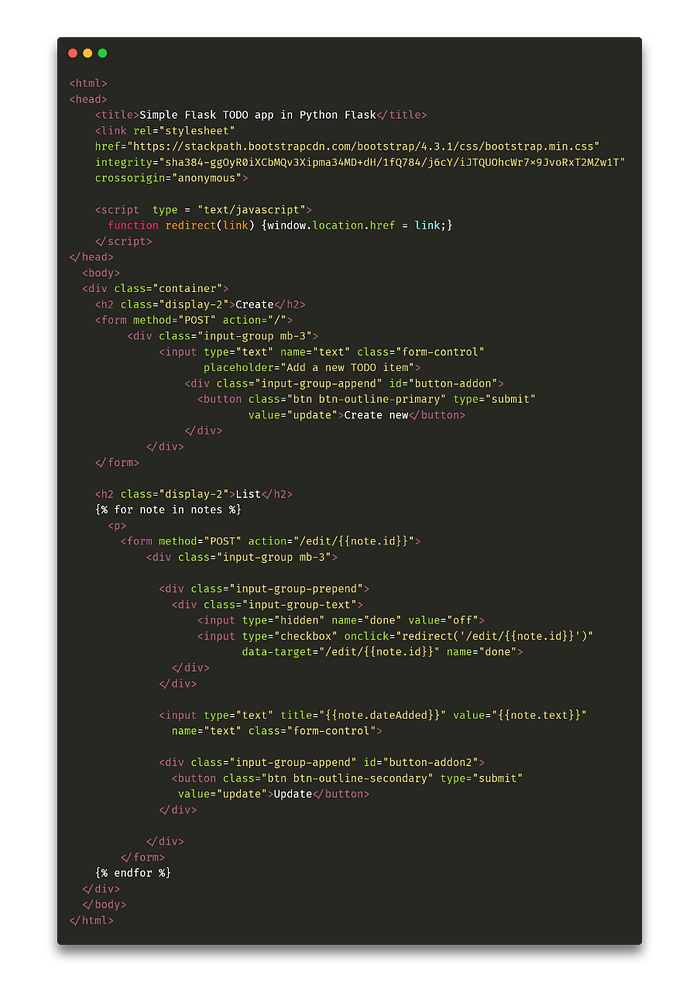 First, we will import bootstrap CSS styles. We will edit all forms into bootstrap styles and change each listed task to a form that will have a checkbox on the left and a button on the right to confirm the text editing. If the checkbox is checked, we call the redirect function via onChange javascript, which sends a GET request to the address /edit/note_id. If the update button is clicked, it will be sent to the same POST request address. We will also add small details such as displaying the creation time of the task on mouse hover. The rendered template now looks like this:
 And this is our final application! We looked at how to create endpoints for creating, editing, reading, and deleting records, connected the frontend to them, and wrapped everything in bootstrap styles to make our application look good, and we did it all in less than 100 lines of code. The whole application is available on my Github. I hope you have learned something new and see you next time!